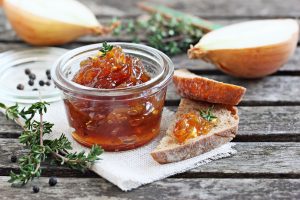
Embark on a culinary adventure that transforms a humble bushel of apples into a velvety delight – homemade apple butter. In this guide, we’ll explore the art of crafting this luscious spread using your oven and a dutch oven. Get ready to savor the essence of autumn with the pure and natural sweetness of apples.
Ingredients:
- A variety of apples (choose a mix for depth of flavor)
- Cinnamon sticks (optional for added warmth)
- Sugar (optional, depending on sweetness preference)
Equipment:
- Dutch oven with lid
- Oven-safe dish
- Immersion blender or food processor
Step-by-Step Process:
1. Apple Selection:
- Choose a mix of apple varieties to achieve a well-rounded flavor profile. Combine sweet and tart apples for complexity.
2. Wash and Core:
- Wash the apples thoroughly, and core and slice them. No need to peel – the skins add color and texture.
3. Layer in Dutch Oven:
- Place the apple slices in the dutch oven, layering them evenly. If desired, insert cinnamon sticks between the layers for a warm, aromatic touch.
4. Slow Roast in the Oven:
- Cover the dutch oven with its lid and slow-roast the apples in the oven at a low temperature (around 250°F or 120°C) for several hours. This extended cooking time allows the apples to break down and caramelize, intensifying the flavor.
5. Check and Stir:
- Periodically check on the apples, giving them a gentle stir. This ensures even cooking and prevents sticking.
6. Blend to Smooth Perfection:
- Once the apples have turned into a soft, caramelized mush, remove the dutch oven from the oven. Using an immersion blender or food processor, blend the apples until smooth. Adjust the sweetness by adding sugar if needed.
7. Return to the Oven:
- Place the dutch oven back in the oven, this time without the lid, and continue to cook until the apple butter reaches your desired thickness. This stage allows excess moisture to evaporate, resulting in a thick and spreadable consistency.
8. Taste and Adjust:
- Taste the apple butter and adjust sweetness or add spices if desired. This is the moment to make it uniquely yours.
9. Store or Preserve:
- Once the apple butter reaches the perfect consistency, let it cool. Transfer it to jars for immediate use or explore canning methods for long-term preservation.
10. Enjoy the Fruits of Your Labor:
- Spread this homemade apple butter on toast, swirl it into yogurt, or use it as a versatile ingredient in both sweet and savory dishes. Let each bite transport you to the essence of fall.
Tips:
- Experiment with apple varieties like Granny Smith, Honeycrisp, or Gala for a dynamic flavor profile.
- Feel free to customize with spices like nutmeg or cloves for added warmth.
- Adjust sweetness based on personal preference – the natural sugars in apples often suffice.
With this oven-made apple butter recipe, your kitchen becomes a haven of autumnal aromas and flavors. Embrace the simplicity of using just apples and a dutch oven, and revel in the satisfaction of creating a velvety spread that captures the essence of the season. Your taste buds will thank you for this delicious journey into the heart of apple harvest goodness.


Be First to Comment